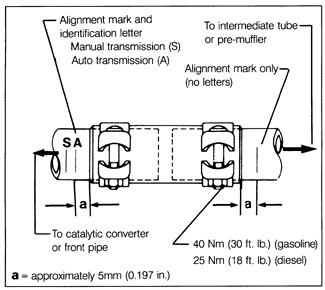
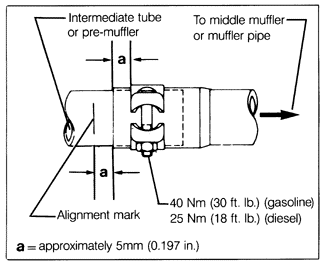
Installing Exhaust SystemLoosely install and align the complete system before tightening any clamps or mounting bolts. Anti-seize compound used on all joints and threaded fasteners will extend service life and make any future replacement easier. Align the clamping sleeve and slip joints as shown in Fig. 4-11 and Fig. 4-12. Make sure that no part of the exhaust system contacts any part of the car body.


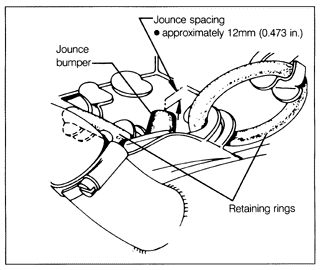
The rubber retaining rings should be installed as indicated in Fig. 4-13. They should be evenly stressed. The jounce bumper should have the clearance shown in Fig. 4-14. Always use new rubber retaining rings when reinstalling the exhaust system.


After the system is loosely installed and aligned, tighten the bolts and clamps. Torque values are given in Fig. 4-1 through Fig. 4-7. After completing the installation, start the engine and check for any exhaust leakage. Some slight smoking and odor as the new parts become hot for the first time are normal. System alignment can be checked by driving the car over a rough road and listening for sounds of the exhaust system striking the body. |