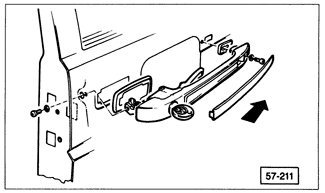
Handles and LocksThe outside door handle must first be removed for access to the door lock cylinder. To remove the handle, pry out the trim strip, then remove the two retaining screws and slide the handle off in the direction shown in Fig. 5-5. Installation is the reverse of removal.

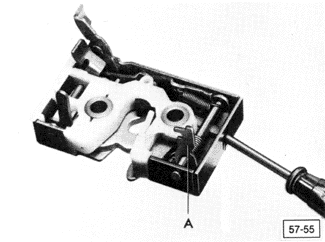
To remove the door lock, remove the interior trim panel and protective liner as described in Interior Trim. Remove the two lock-retaining screws and pull the lock part-way out. Remove the two actuating rods from the lock and pull it from the door. To install the lock, first use a screwdriver to hold the lock lever at a 90° angle as shown in Fig. 5-6.

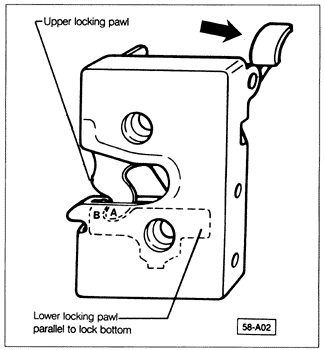
Position the lock to the door, and attach the lock actuating rod to the lock lever, and attach the door lever rod, then remove the screwdriver. See Fig. 5-7. Install and torque the two lock mounting screws to 21 Nm (15 ft. lb.).

To remove the inside door actuating lever, first remove the lock as described above, then remove the strap from the panel and slide the door lever assembly from the door as shown in Fig. 5-8. Installation is the reverse of removal. A door that is difficult to open from the outside on 1985 and 1986 models may be caused by excess freeplay in the door trigger unit. Later models have a plastic sleeve installed on the lock lever to correct this. The sleeve is available from an authorized Volkswagen dealer for retro-fitting, part no. 176 837 149 (front door), and part no. 176 839 149 (rear door).

To install the plastic sleeve, remove the door lock retaining screws and partially remove the door lock from the door. File off any burrs on the lever. Install the sleeve as shown in Fig. 5-9. Reinstall the lock and torque the screws to 21 Nm (15 ft. lb.). Check lock function before closing the door by pushing the locking pawl into the lock, then releasing it with the handle trigger.

|